Tutorial Details: How to Draw a Tropical Bird
- Program: Adobe Illustrator CS6 – CC
- Difficulty: Intermediate
- Topics Covered: Shape Building, Live Corners, Align panel
- Estimated Completion Time: 20 minutes
Final Image: Tropical Bird
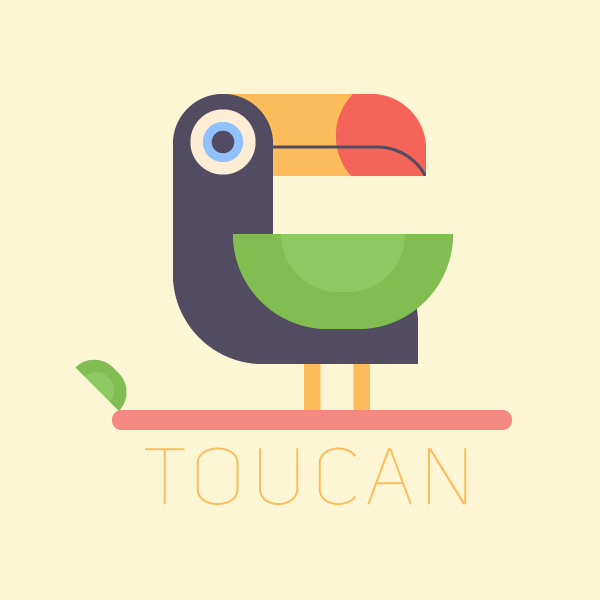
In this tutorial, we’ll add an exotic touch to our summer mood by learning how to draw a tropical bird and creating a vivid toucan in Adobe Illustrator. We’ll be drawing this flat-style toucan using basic geometric shapes, working with corners, and exploring the Align panel. Let’s get started!
Step 1
We’ll learn how to draw a tropical bird by starting with the head of our toucan. Use the Rectangle Tool (M) to make a 100 x 140 px dark greyish-blue shape.
Take the Direct Selection Tool (A) and select both top corners of the rectangle. Once you see a circle marker of the Live Corners, pull it down to the center of the shape making the top of the rectangle fully rounded.
Another way to adjust the corners is to click the needed anchor points (corners) with the Direct Selection Tool (A) and then set the desired value in the Corners window in the control panel on top.

Step 2
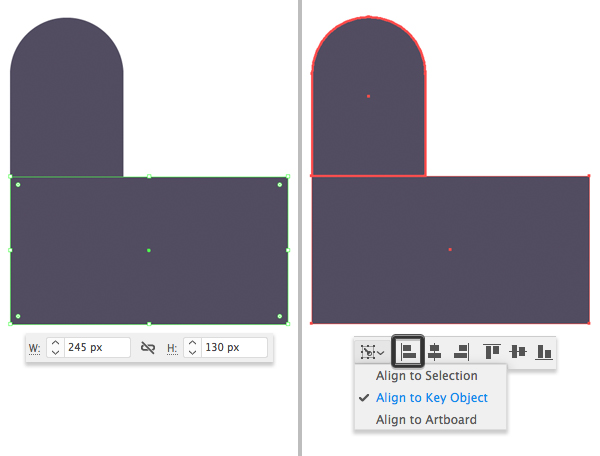
Now let’s add a body. Use the Rectangle Tool (M) to make a 245 x 130 px shape and attach it to the bottom edge of the head.
Let’s make sure that our shapes are perfectly aligned. Select both shapes with the Selection Tool (V) and click the head shape once again (you will see a thicker selection along its edges). This way we turn it into a Key Object. Now click Horizontal Align Left to make both shapes aligned to the left edge of the head. There we have it!
Step 3
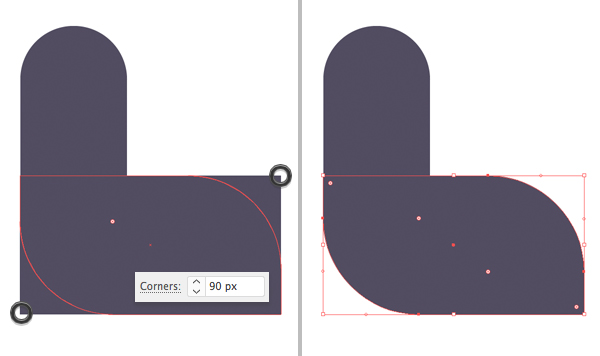
Switch to the Direct Selection Tool (A) and select the top right and bottom left corners of the body shape. Pull the Live Corners marker to make the corners rounded. You can also control the corner radius value manually by setting it to 90 px in the control panel on top.
Get millions of stock images and videos at the best price
Unlimited access. No attribution required. Starts at just $9/month.
Step 4
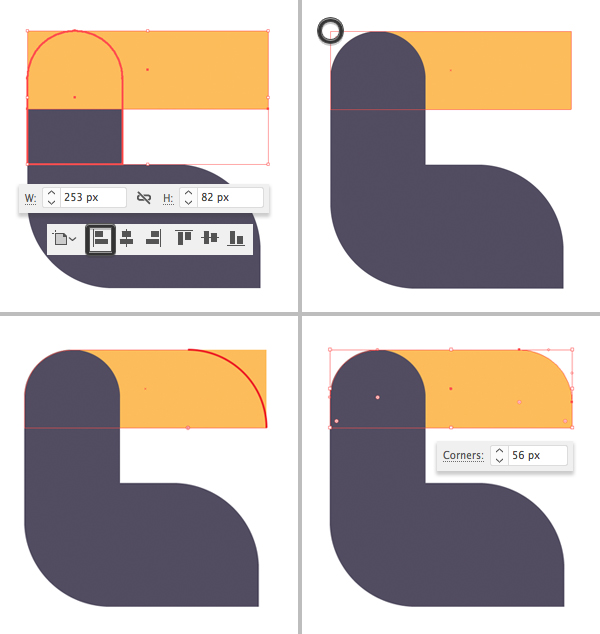
Let’s move on and add a beak using the Rectangle Tool (M). Create a 253 x 82 px orange shape and press Shift-Control-[ to Send to Back.
Select the top left corner and make it fully rounded, using the Live Corners feature. Then do the same for the opposite top corner and make it rounded to about 56 px.
Step 5
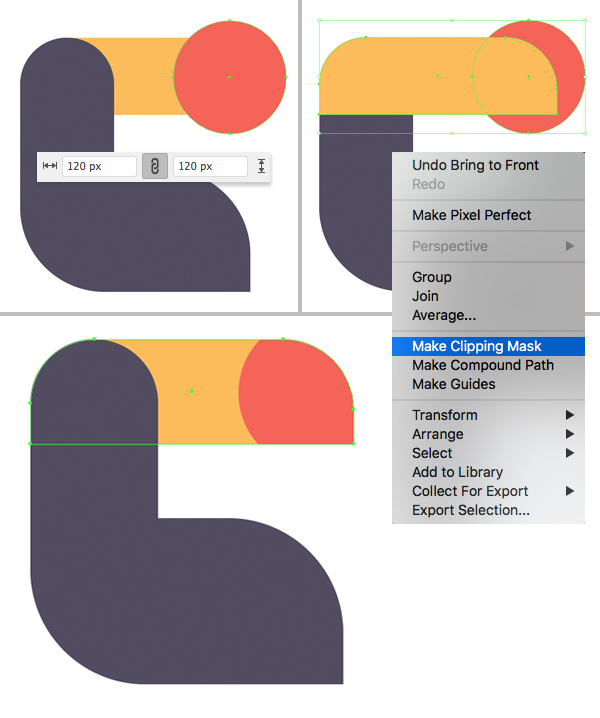
Let’s add a bright spot to the beak. Take the Ellipse Tool (L) and make a 120 x 120 px bright-red circle.
Now we need to hide the unneeded parts of the circle inside of the beak. Copy (Control-C) the beak shape and Paste in Front (Control-F). Press Shift-Control-] to Bring the shape to Front.
Select the beak copy and the red spot beneath it. Click right mouse button and select Make Clipping Mask. Great! Now only the tip of the beak is red.
Step 6
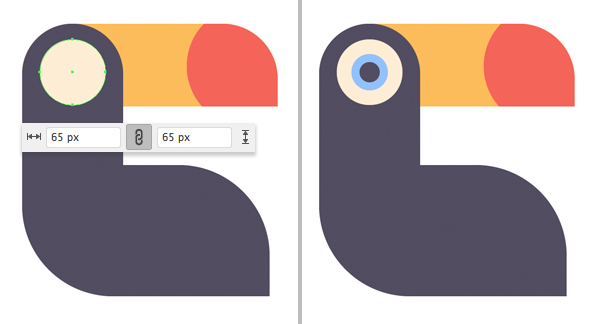
Use the Ellipse Tool (L) and make a 65 x 65 px white shape for the eye. Add a couple more circles of smaller sizes on top, forming the pupil and the iris.
Step 7
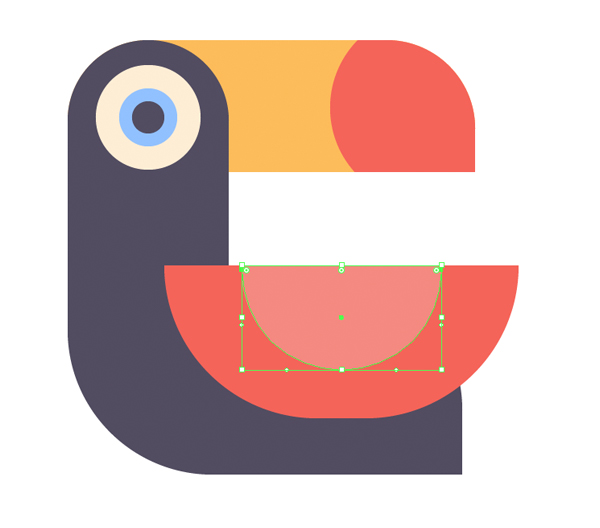
Now let’s add a wing. Start by making a 220 x 95 px rectangle of a bright color, adding contrast to our character. Use the Direct Selection Tool (A) to make the bottom part of the shape rounded.

Step 8
Add a smaller copy on top of the wing, making it more detailed.
Step 9
Go on and use the Rectangle Tool (M) or the Rounded Rectangle Tool (it can be found in the same drop-down menu in the Tools panel) to create a wooden stick from a 400 x 20 px shape.
Add two orange rectangles for the bird’s legs. At this step I’ve also changed the color of the wing to green, I think it sits our toucan better.

Step 10
Finish up with the illustration by adding some minor details to our tropical bird. At this step I’ve added a line to the beak, using the Pen Tool (P). I also used a smaller copy of the wing to attach a leaf to the left part of the stick.
Finally, I’ve used a 600 x 600 px light-yellow square for the background.
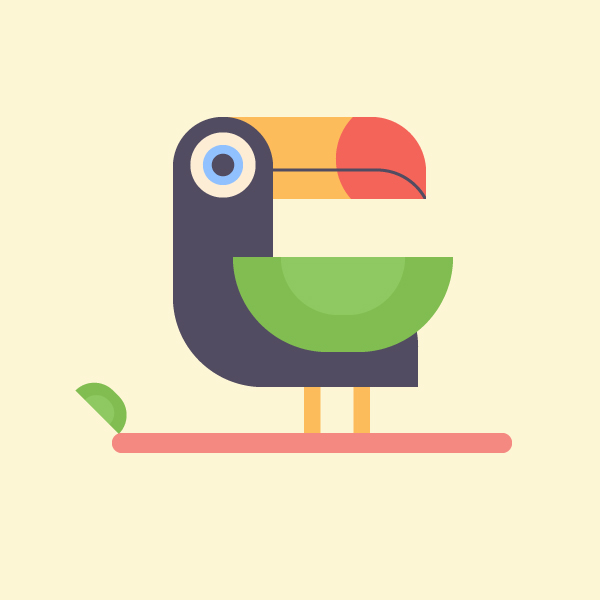
Woot! Our Tropical Bird Illustration is Finished!
Great job, you now know how to draw a tropical bird! I hope you’ve learned something new from this tutorial and enjoyed following these simple steps.
Have fun illustrating, and come back for more!


