The logo is the most critical aspect of any company’s design and branding efforts. Your logo will appear on just about everything your business produces or uses for marketing purposes, including business cards, brochures, advertisements, product packaging, a website, social media profiles, and more.
In some instances, like a business card, your logo will be very small. But in other cases, like signage on your office, the logo may be quite large. Your logo should be saved in a vector file format to ensure it can be displayed at any size and still remain sharp with crisp colors and transitions. Vectors consist of shapes, lines, curves, and points and use mathematical equations to be displayed at any size without loss of quality.
On the other hand, raster files or bitmap images are made up of tiny pixels that form the details of the image. This format is better for complex digital images like photographs. However, when the image is enlarged to a higher resolution, the pixels become visible to the naked eye and the image loses clarity and sharpness. (For more details on these image types, please see Raster vs. Vector.)
A logo that’s in raster or bitmap format (file types like PNG, JPG, and GIF) will not look good when used at larger sizes. To have a versatile logo that can be used for any purpose and at any size, it must be a vector file (file extensions like AI, EPS, and SVG).
If your logo design is currently only available in bitmap or raster format, you’ll need to convert it to vector. Once you have the logo in vector format, you’ll be able to use it for any purpose and at any size.
Vectorizing logos can be straightforward as long as the logo is simple, and thankfully most logos are rather basic. Converting a more complex image with a lot of design elements to vector format is challenging and doesn’t always yield the best results. However, simple logos or icons can usually be vectorized without trouble. We’ll look at two different options below.
Before we cover the various ways to vectorize a logo, it’s essential to point out that the most ideal method is to simply have your logo designed in a vector format to begin with. It’s possible to vectorize the logo later on, but the results aren’t perfect. If you’re hiring a professional to design the logo for you, be sure to get it in a file format like AI (Adobe Illustrator), EPS (Encapsulated PostScript), or SVG (Scalable Vector Graphics). That way you won’t have to go through the process of vectorizing the logo. However, if your logo is already designed and you don’t have a vector version, you can follow the steps below, even if you’re not a graphic designer.
Get millions of stock images and videos at the best price
Unlimited access. No attribution required. Starts at just $9/month.
Vecteezy offers the largest selection of high-quality vectors. We have millions of free vectors that can be used in your personal and commercial design projects. Browse our selection of free downloads here.
How to Vectorize a Logo
Vector editing apps like Adobe Illustrator and Inkscape include functionality to trace bitmap artwork and convert it to vector format. You can use either program, but we’ll be using Inkscape for this tutorial. Inkscape is completely free to download and use, so there’s no need to purchase expensive software to vectorize your logo. In the second method, we’ll look at an online tool you can use to accomplish the same thing.
Option #1: Auto Trace in Inkscape or Illustrator
First, we’ll use Inkscape to convert a bitmap logo into a vector. Here is the sample logo we’ll be using.
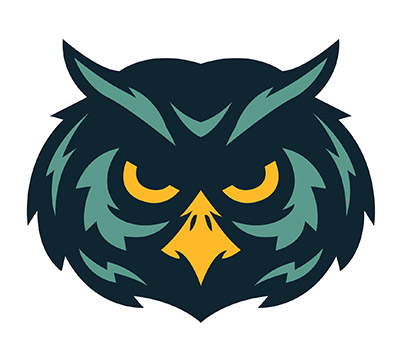
It looks good at a small size, but since it’s a bitmap/raster image, it gets pixelated when enlarged.
This logo would not work very well at large sizes, so we’ll need to vectorize it. To start with, open Inkscape (download Inkscape here if you don’t already have it) and then go to File > Open and find your logo file on your computer. Click “OK” to open it.
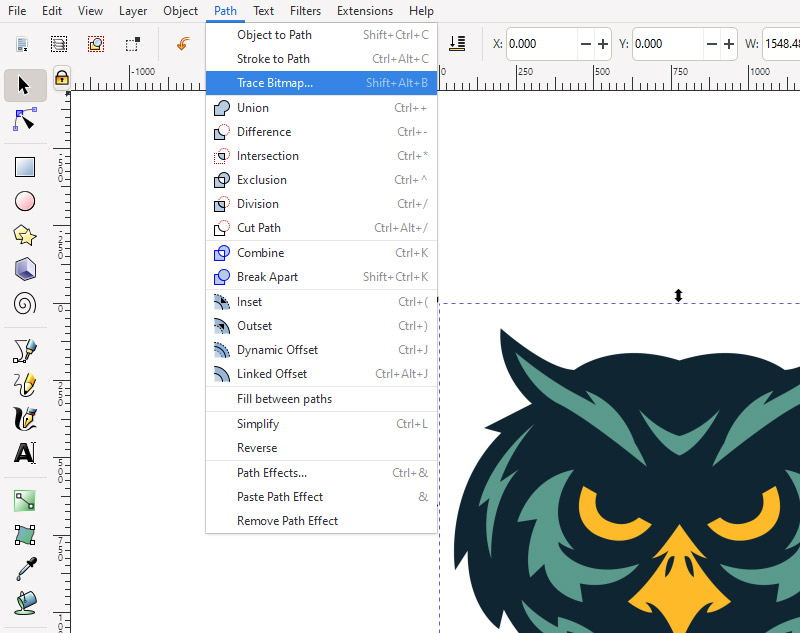
Next, go to Path > Trace Bitmap.
Now, you should see the Trace Bitmap panel and settings open to the right. There are a number of different settings you can adjust, and some trial and error may be needed to get the best results. I’ll show the settings I’m using for this image, but depending on your logo, the ideal settings may be a little different.
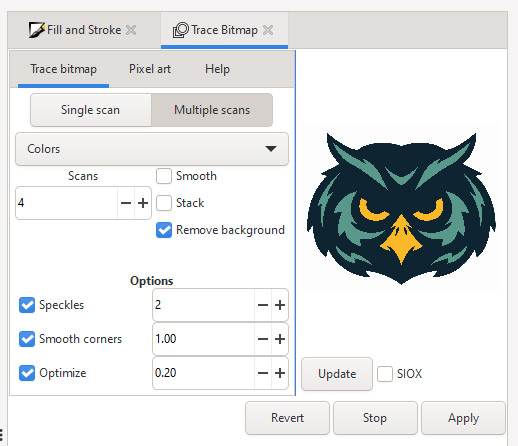
Near the top, you can select either “single scan” or “multiple scans.” Often, a single scan will work best for simple black and white images, and multiple scans will work better for color images. Since I’m using an image with three colors, I’ll select multiple scans. You can also adjust the number of scans. I’m using four because the preview image doesn’t show all of the colors if I go any lower than four on this setting. I’ve also ticked the box to remove the background.
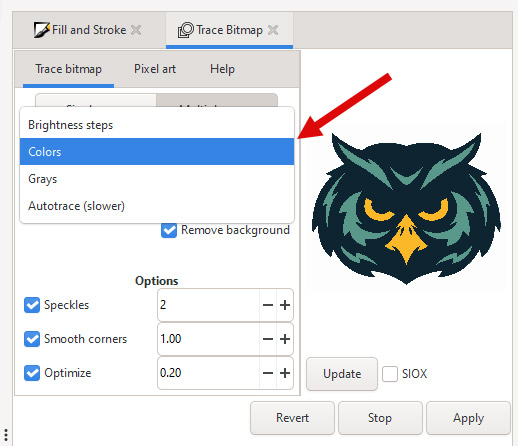
In the dropdown (shown below), there are a few choices. As you can see, the “Autotrace” option tends to run slower, but the “Colors” setting tends to work well, and that’s what I’m using in this case.
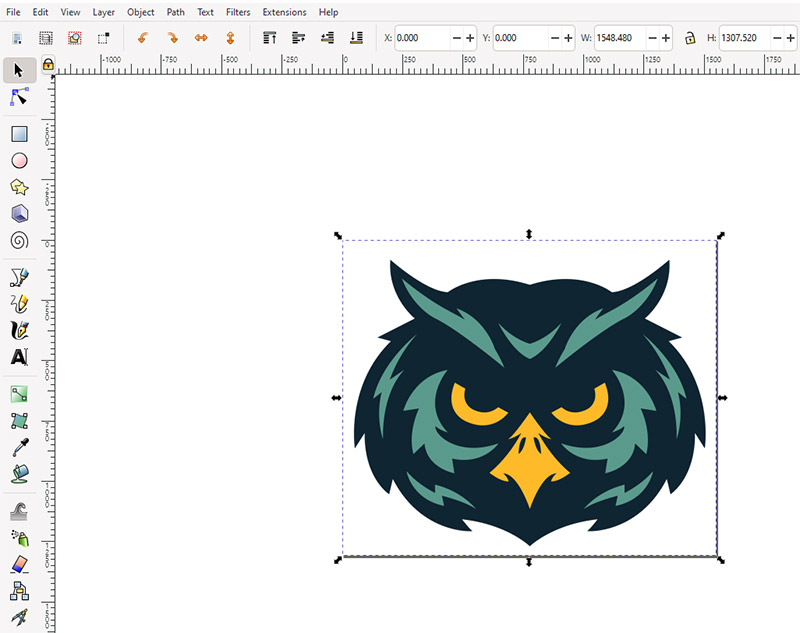
Thanks to the preview image, I can see that the scan looks good and I’m ready to complete the process of vectorizing the logo. To do that, I’ll click the “Apply” button. When you click “Apply”, a new vector version of the image will be placed on top of the original image. With the vector graphic selected, I’ll simply drag it to the left.
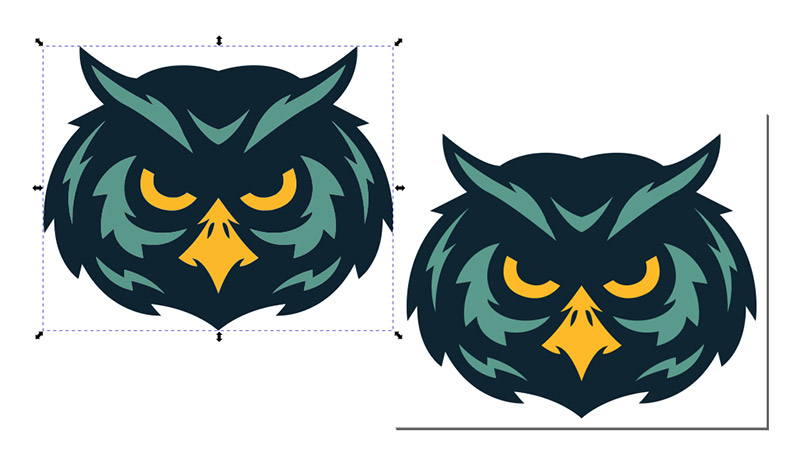
Now, I can select the original bitmap version of the logo and delete it. Then, I’ll move the new vector logo back to the center of the document.
I can zoom in and see that the logo has much cleaner edges when viewed at a larger size.
The last step is to save the new logo image in vector graphics format. Go to File > Save As.
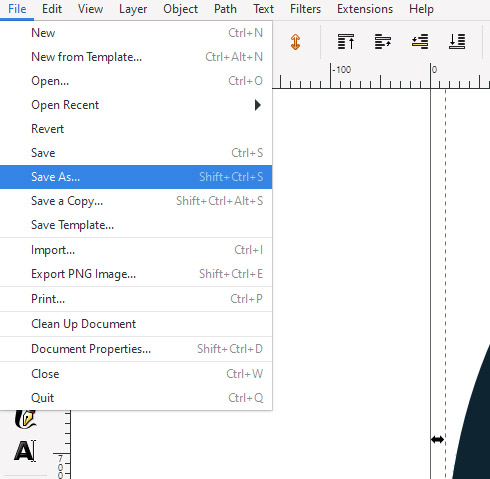
The default file type or native format of Inkscape is SVG, which is a vector format. You can save your logo as an SVG file, or select a different vector file extension like EPS if you prefer.
Not sure which file format to use? See our EPS vs SVG comparison.
Now you have your logo in vector format!
Online Vectorizing Tools
While vector-based programs like Adobe Illustrator and Inkscape are both capable of vectorizing logos, there are also other web-based tools that will accomplish something similar. However, it’s important to be aware that not all of these tools work in the same way. You may find file conversion tools that will convert a file from raster format (PNG, JPG, or GIF) to vector format (EPS, SVG, or PDF). However, most of these conversion tools will not actually vectorize the image, they’ll just save it in a vector file extension. If that’s the case, the quality of the logo will still suffer when it’s enlarged.
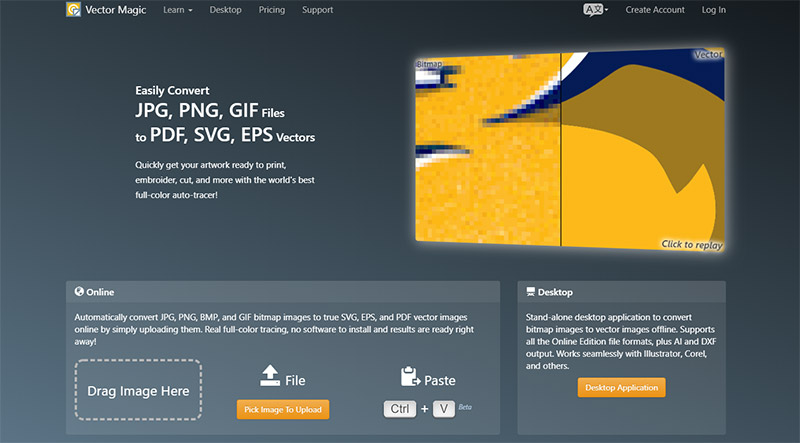
What you want is an online tool that will actually vectorize your raster graphic. One of the most popular tools of this kind is Vector Magic. It’s free to try, but you’ll need to make a purchase in order to download the vectorized image. There’s a small monthly cost for the online version (desktop version available for a one-time fee), but you can cancel after the first month if you only need it for one image.
To get started, drag your logo onto the screen or click on the button to upload the image.
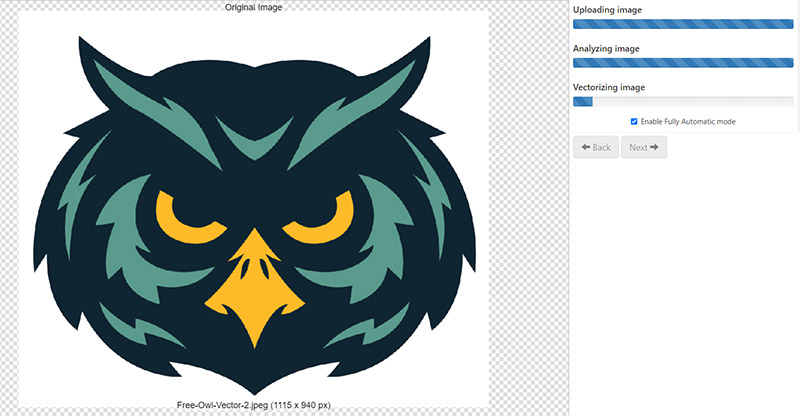
The nice thing about Vector Magic is that it handles everything for you and you don’t need to make any decisions. You’ll get the finished design in minutes, if not sooner. However, if you want more control, you can uncheck the “fully automatic mode” box.
Once it’s done running, you can see the original image on the left and the vectorized logo on the right. You can even zoom in and see how crisp and clear the new version is.
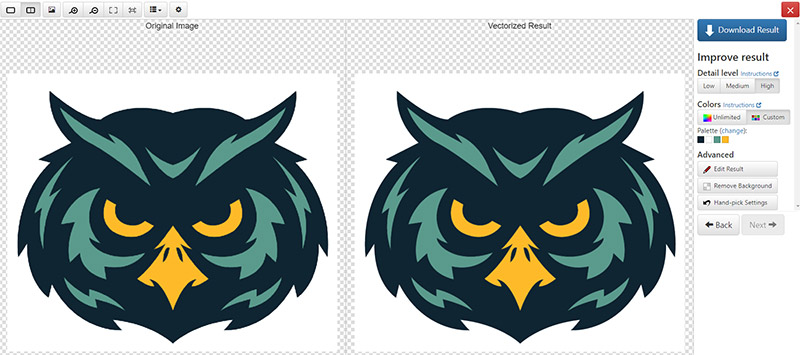
From my test results, the conversion done by Vector Magic was significantly better than the scan I did in Inkscape. Both were passable, but Vector Magic demonstrated more accurate vector tracing. The edges are cleaner and the transitions between colors are sharp and crisp (see zoomed-in image below).

If you’re happy with the results from Vector Magic, you can click the button to download the result and make the purchase.
Tips for Accurate Conversions
Here are a few simple tips to help you get the best results when vectorizing logos.
1. Use the Largest, Clearest Version of the Logo Available
If you have multiple different files of your logo, check each one and find the version that has the highest resolution (most pixels, not just the largest file size) and appears to be the clearest, especially around the edges of the logo. You’ll get better results when tracing a larger, clearer image.
2. Experiment With Different Settings
If you’re using Inkscape or Adobe Illustrator to trace the design of the logo, you’ll need to try different settings and see what produces the best results. Use the preview image to see the changes that occur as you adjust the settings.
3. Tweak the Results, if Needed
After the trace in Adobe Illustrator or Inkscape, you can clean up the image by making small adjustments. This is more likely to be needed with complex images or drawings. In Inkscape, select the Nodes tool, and then you’ll be able to click on any of the nodes (the small boxes) and move the points as needed to adjust the curved lines.

Final Thoughts
It’s always preferable to have your logo created in vector format from the beginning. However, if your logo is already designed and you only have it in raster/bitmap format, there are ways to convert it into a basic vector image. Inkscape is free vector-based software and the bitmap trace feature works pretty well. You could also use Illustrator, if you have it, or pay for an online tool like Vector Magic. Whatever you decide, it’s possible to get a vectorized logo that will remain clear at any size, even if you’re not an expert at graphic design.